


Today we are talking about 5 tips for styling wedding details and how to improve! This entire month we’ll be popping in with new videos ALL about details on the wedding day. Our goal is to get photographs for our couples that show off all of their intentional choices on their big day – so tune in to learn 5 quick tips to knock it out of the park!
GRAB YOUR FREE DETAIL STYLING CHECKLIST
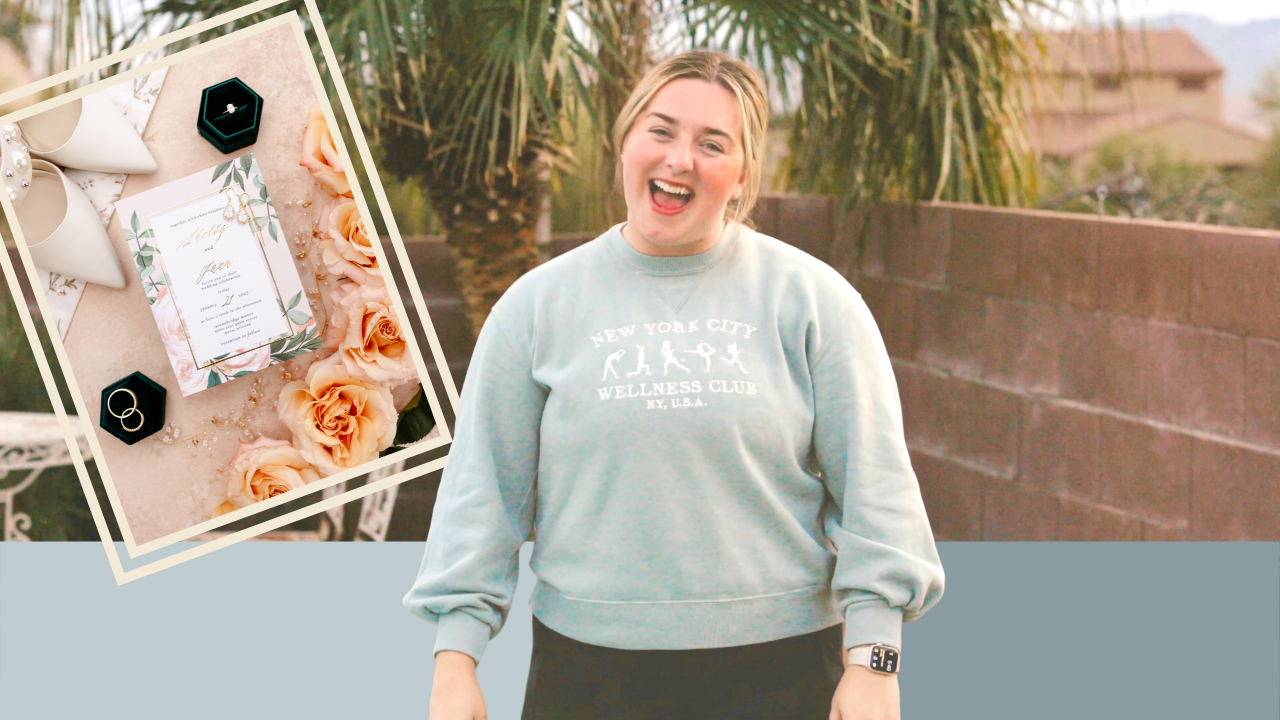
Making sure to take intentional time styling the wedding details is so important because it highlights the choices the couple made for their wedding. Photos that they can look back on that are clean and classic. In 5, 10, even 20 years, they can look at these photos and say, “wow, look at our shoes!” or “how cool is our wedding band?” Seeing those elements together is so fun.
Wedding details also serve as a place to be able to introduce the wedding. It sets the scene and also structure to make sense in an album. It allows the album to be cohesive and tell the full story of the day.
Something that is not a main goal of ours is to try and get our images published in a super awesome elite magazine or an online publishing forum. Would it be cool? Heck yeah! Is it something we’re investing time and resources into? Not necessarily.
We’re also by no means an expert on styling, but this is how we get those classic images that our couples love and love to look back on.
Tip #1 – Prepare Our Couples
Our first of our 5 tips for styling wedding details is to always prepare the couple. We let they know what they need to bring and how to prepare it. We send them a detailed checklist that lists everything that they could possibly want in their detail photos. All three of their rings, the pieces of their wedding invitation, their accessories, shoes, ties, cufflinks, hair pieces, for example.
We give this to them in their wedding guide when they book with us. Additionally, it pops up in various places in our workflow including a couple weeks before their wedding as their preparing.
We ask them to put all of their details in a box so that we can arrive on their wedding day, greet them, check in, and grab the details. That way, they’re not having to scramble around their bridal suite trying to find the items they want to include – it’s all ready to go!
This detailed checklist, we want to share it with you guys! We have a link in the bio and you can go grab it for free. Enter your email, download it, and that’s something you can share with your couples directly.
Tip #2 – Use Risers to Elevate Your Flat Lay
Your flat lay does not actually need to be flat. In fact, we think it looks better when it has some dimension to it. For our risers, we typically use small acrylic pieces that are clear squares that we get on Amazon! There’s a link in the bio of the video for that as well. We also have a full video on our channel that includes our entire styling kit. If you want to see what exactly is included in ours, check it out here!
We use the risers to just prop up pieces of the invitations to be able to get some depth from whatever our background is. It allows us to get a little shadow which looks natural and really makes it look a little more high end. Of course, you can use a lens cap or extra boxes, whatever it may be, to add that dimension.
What we typically like to do is add a riser to the main invitation piece and then everything else will softly fade away. Especially things like the accommodations card or the hotel information that don’t necessarily need to be in crisp focus.
Tip #3 – Be Conscious of Color and Heavy Items
Our third of our 5 tips for styling wedding details is to be conscious of color and heavy items!
Things that really draw the eye are details that are darker colors or super bright colors whereas the invitation suite might be neutral. If I have a lot of green elements or a lot of pink elements, I want to spread those out.
Typically, I’ll look for different corners. Bringing these details to different corners is really appealing to the eye and spreads out those strong colors.
Additionally, consider things that feel heavy. These are often going to be color related as well, such as dark shoes. They are heavy with a dark brown, camel, or black so I want to spread those out again and typically am looking at opposite corners.
Tip #4 – Be Conscious of Negative Space
Typically, when doing invitation suites, there are a lot of different layouts that you can do. 90 degree angles, or parallel to each other, or sometimes they’ll be more mishmashed at 45 degree angles.
Regardless, I’m going to want to be conscious of negative space. For us personally, we can’t always see that with our eyes right away. What we like to do is get stuff laid out, spread out all of the colors, and spread out the heavier pieces. Then, we like to bring out our camera, or sometimes even just our phone, and take a quick snapshot of the flat lay. It will really illuminate any big negative spaces that you aren’t able to see right away.
In addition, if I have things parallel or 90 degree angles, I can take a quick shot. I can see that the negative space isn’t quite parallel because little details like that will look very off in a final photo.
I need to make sure the space in between each piece is the exact same width or the exact same height, so be really conscious of that negative space.
Tip #5 – Use Natural Elements
This really elevates our detail shots and typically it’s going to be with florals or greenery.
What’s awesome about using natural elements is that it really softens the design. It also adds a flourish and makes it look a little more high end.
Plus, flowers and greenery typically have a lot of depth and layers to them, which is going to look really great in any soft of detail or macro shot.
How you can obtain florals for you flat lay is one of two ways: either you or your couples can reach out to the florist in advance.
Typically, it’s very affordable and will be included in the invoice. This is a great idea if you want to build a good relationship with florists. Ask if they have any extra buds that you could grab from them. We’ve had really great luck with florists being awesome about that.
Another way is on the day of. You’re most likely going to be setting up while the florist is setting up as well. They may have extra buds that they haven’t used for the ceremony backdrop or the reception install that they might be willing to give to you.
We love to be prepared in advance if at all possible. What’s really great about the natural elements of the florals and greenery will then tie in to the entire rest of the day. Your detail photos will look very cohesive with the ceremony details or the bridal bouquet.
Thanks For Tuning In!
And that’s all for now! Thanks for tuning in to our 5 tips for styling wedding details. Next week, we have a video coming at you which is one of our DIY hacks for backgrounds for your detail photos! It’s a really easy thing if you’re in a pinch. This entire month, we have lots to show you about details!
Let us know if you have any questions, we love to chat in the comments! Like and subscribe to our channel to stay up to date. Otherwise, until next time!
